Showing posts with label DIY Projects. Show all posts

Saturday, June 25, 2011

DIY Diaper Cake


A little late, but i wanted to post pictures of the diaper cake i made for my sisters shower a few months ago. I watched a few you tube videos and read various instructions and took a swing at it- I have to say i was pretty impressed with the results. Its not too difficult to make, but like with all projects, you just have to have a little patience.

First- decided whether or not your going with a theme or a gender. Since her shower was more so an animal jungle theme I decided to go with jungle like animals. You can also incorporate additional items into the cake its self. I've seen a few with bottles, baby blankets, baby lotion, pacifiers, etc. Here is a snapshot of what i used & for the cake itself i used 96 size 2 diapers, black hair ties and larger rubber bands.

First i began by rolling each diaper up and securing it with a black hair tie. I made sure i rolled all the diapers in the same direction and rubber banded them roughly in the same spot.

You want to ensure that they are rolled pretty evenly as far as tightness and that they are able to stand on their own. This will make the cake building processes a lot easier.

As i began building my cake I realized that using only 96 diapers would make a small cake, smaller than i wanted it to be. So i quick improvised and wrapped a cookie tin in tissue and added bulk/size by wrapping diapers around the tin. I've seen people wrap diapers around baby bottles, cans of formula and  blankets.
As you can see the diapers are all roller in one direction. This is where the larger rubber bands come in. Once all the diapers are in place place the larger rubber band around them all to secure them together.
The mid tier was starting off unevenly proportioned to the bottom tier so i wrapped the diapers around a toilet paper roll, which worked perfectly!

The top tier i wrapped around a bottle of oregano! That was the only thing in my pantry that fell into the size proportion i needed. This flat surface also worked well for the 'cake topper', so if your using some sort of topper this might be a good idea, though it doesn't have to be oregano ;-)

Once all the layers were assembled, i wrapped a thick brown ribbon, 1.5 in i think, around all three tiers using double sided tape to secure it to the diapers.


I added an accent color to the middle tier. I decided to only add it to the middle tier because I didn't want the cake to become overwhelming to look at.

Once done, i added the small decorations to the cake and used double sided tape to keep them in place. If your wondering where I got the small stuffed animals from... long before we began to plan my sister baby shower  McDonalds had an animal themed happy meal. So what did a dedicated sister do? I bought happy meals until i got the two stuffed animals that i wanted- the giraffe and the tiger.


Here is the cake topper that i used. I bought the pacifiers from her registry, curled a little ribbon and wrapped a monkey beanie baby around it.


Here is a few other pictures of the finished product. 


and yes, i fixed the center ribbon once i noticed it was crooked by the baby wash.


and if your wondering that is the same wrapped board i used here and used here.

Wednesday, May 25, 2011

DIY-Moon Manicure

Let me begin by apologizing about the pictures. They are pictures from my phone.
So the concept of the moon mani is that there is a moon at the base of your nail peeking out. You can really do any color combo but i wanted my moon to be bright.


I did them myself, when i asked the nail shop.... (yeah i know)


if they could do it and she said it was only possible with a full set. So after a little research and you can see my results above.


Its pretty easy!


1. Paint your entire nail the color you want your half moon to be. Or you could leave it unpainted with just a clear base coat
2. Allow the nail to completely dry. Its important because if its not fully dry. You'll see. Use hole reinforcement stickers ( you know those little circle stickers that you use when your paper punched hole rips and no longer stays in the binder? yeah, those.) and place them on the base of your nails.
3. With the next color paint only above the sticker. Again. Wait for the polish to dry again. 
4. Remove the sticker. 
5.Apply a top coat and Voila! 

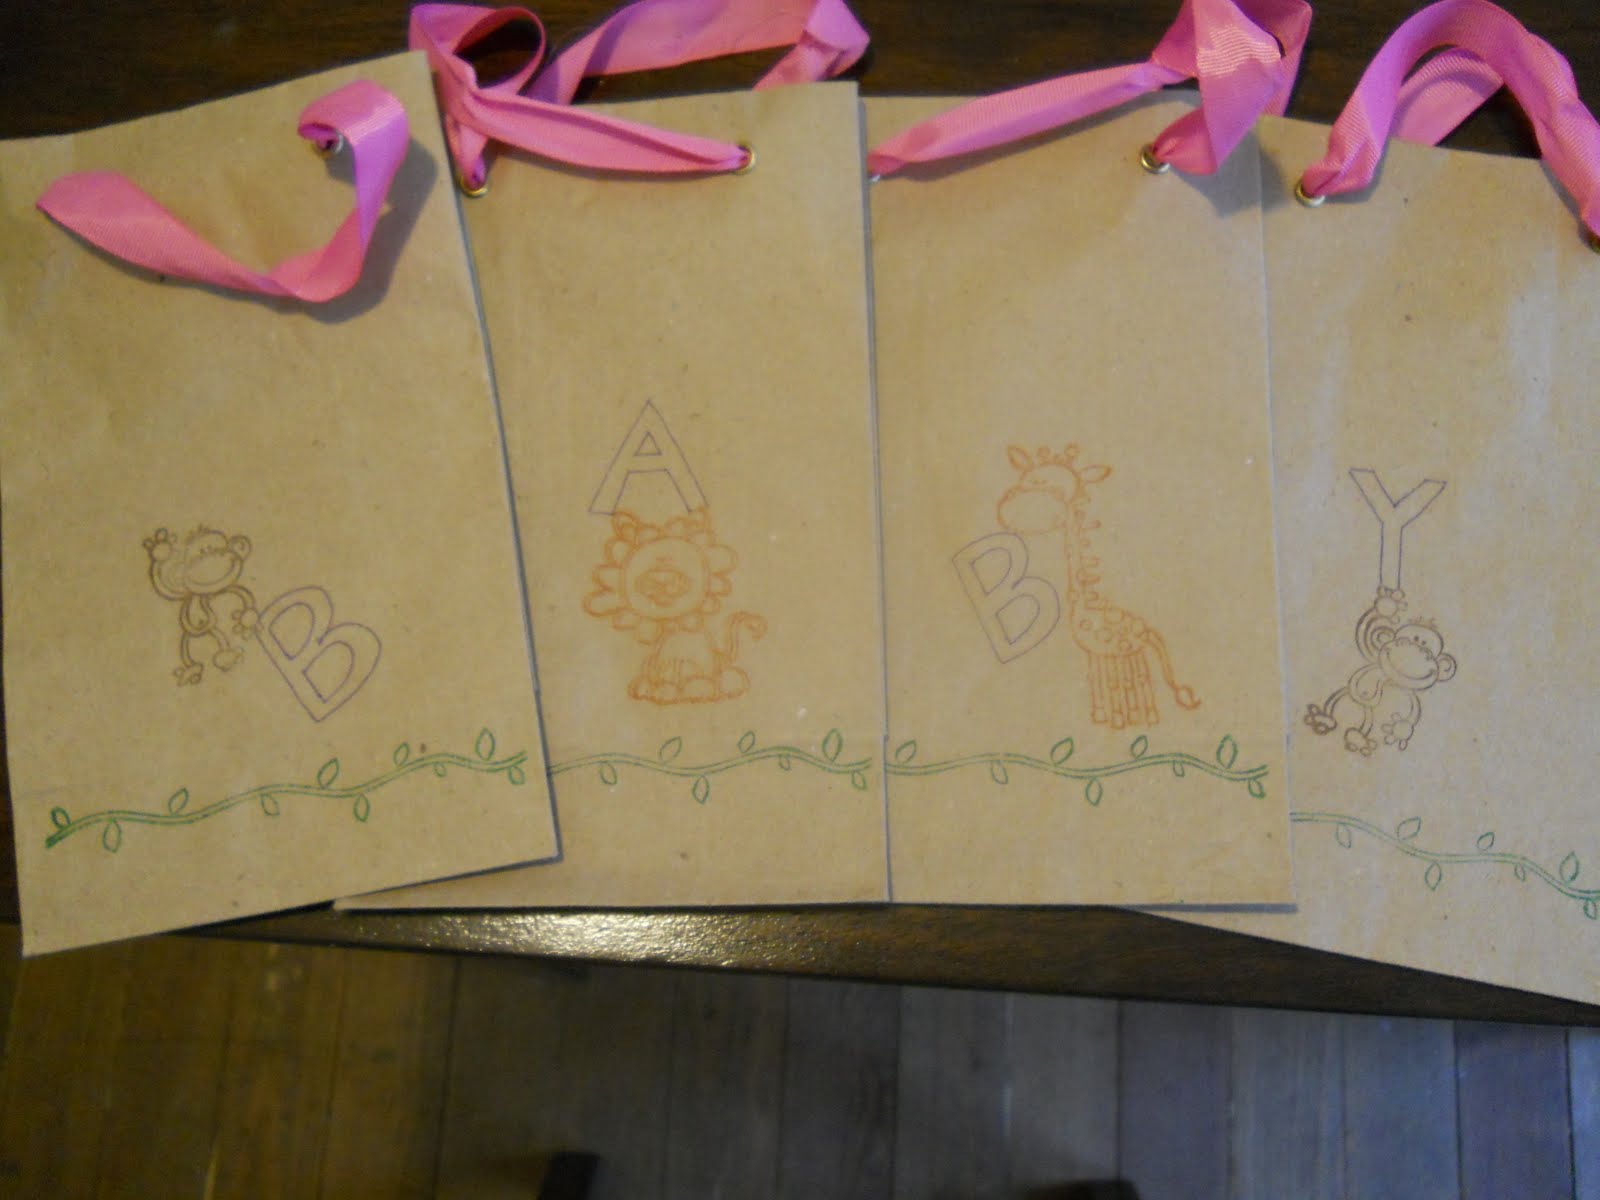
DIY- Favor bags

My sister, Gaby had a baby! 2 months ago. Remember? I made the gender reveal cake for her? Well i was also very happy to co host her baby shower back in February. I'll tell you more about her shower later- but meanwhile i wanted to show you a few ways i personalized her shower for her and my then soon to be born monkey.

I decided on a jungle them for her shower and i wanted to incorporate it as much as i could. Everyone loves shower games (sorta) and prizes so i decided to decorate the gift bags. 

I  bought paper bags with ribbon handles- and yes i know that was sorta girly but they didnt have any blue. Baby wouldn't remember =-)

I purchased jungle animal stamps at Michaels, along with a few colors. I only did a few colors because i didn't want to 'bite off more than i could chew' and end up with ink everywhere.

I had acrylic blocks at home that i used for my wedding. You can see it in the lower left hand corner, its pretty neat the gummy stamp sticks to the acrylic block, the block is see through and has guiding lines

 I then stamped on green vines along with a variety of animals. Note that the monkey appears twice... sure im a little biased. Once that was dry i went through and free handed the word BABY across the 4 bags.

 Its nothing extremely difficult (or fancy)... but its the little details that make any event special.

Plus i like to test my Martha gene out every once and a while. Sometimes i crash and burn... but others, not so bad.

Wednesday, October 27, 2010

Wall Art

Juju has taken over my dinning room. That's right my dinning room, well now its his. He has set up his laptop and has spread his school books across every inch of my beautiful dinning room table. Then he uses this old, a bit broken down, white board to keep track of his assignments. Since this whiteboard is unsightly huge, he usually props it on the floor, against the wall, on a chair etc etc. because there was no way i wanted him to hang that thing on the wall.

See? It takes up 1/3 of the wall.

Here enters the brilliant idea of having it be functional for Juj and not an eyesore for the rest of the world. Since we are still working on a budget, we had to figure a way to solve this issue- inexpensively.

After much brainstorming, we decided on the project below. There was a few adjustments along the way, 3 visits to the store ( 2 Menard's, 1 Joann's) and blood, sweat and tears.

We purchased the needed supplies to build a tension cord system.


Here is a close up of the metal cord, cord 'crimper', turnbuckle and eyelet thingy.

Next we took 4 (14x18 i think) wrapped canvas that we already owned, and wrapped them in fabric purchased (on sale 50% off! orig.39.99/yd) at Joann's. For anyone interested in wrapping canvas in fabric, i strongly suggest purchasing a can of fabric adhesive. Its not necessary, but it makes it a lot easier to align the fabric to the desired position. Then simply fold and staple.

Watch your fingers though, using a staple gun can be very dangerous.... here is were the blood part came in.

Here is one canvas just about done being wrapped.

Here is a close up. Pretty darn good eh?

Next we took 2 wrapped canvas an reinforced them together by adding a wooden backing, supporting each frame individually. This created 2 separate panels. In the left picture (on the right side) you can see  how we created a panel, using  2 individual canvas. We measure 4 in. from the edge and carefully ( if you drill too fast you will snag and create pulls in the fabric) drilled holes to insert the hooks that would hook on to/sit on the actual metal cord.

So here you have it- Finished project. To hide the eyesore that is Juj's whiteboard we simply slide both panels together, creating a 'mural' if you will.

AND when juju needs to use the whiteboard, he simply slides the panels apart.


Overall this project was very inexpensive. It cost us about $48, and we have a lot of left over parts, pieces, 'capital' if you will, for our next project.

Sunday, May 17, 2009

Monogrammed Aisle Runner

When Juju and i first got engaged, i wanted a wedding with personal touches that would set it apart from the rest. I came across the idea of a monogrammed aisle runner. I know many brides have used one, but the neat thing is that everyone's monogram is different from the next. In our case, we didn't use our names and date. Instead we used the monogram Juju created.

I have to admit, when i told people i was monogramming my own aisle runner, they looked at me a bit crazy. Even Juj had doubts. He suggested i get something screened on, or have a huge stencil created. But Lorena had faith. Once i found the swirly hearts -not flowered- fabric runner i was set to go. Note, you have to use a fabric runner or else it wont work. I only say this because i read about a bride who didn't notice she needed to get a fabric one until her paint was bubbling on top of the runner.

And here is my completed project with a few instructions-

In order to get the monogram in the right location, i double checked with our church to ensure the length of the aisle and to confirm which way they rolled the runner, altar to doors or doors to altar. I unrolled our runner to find the desired position for the monogram, 3/4 of the way down the aisle, coming away from the altar- so basically closer to the doors.

I had juju blow up the monogram to print on a 4 pages, so there was a 1/4 of the monogram on each page, sort of like a puzzle. I aligned all the pieces and taped it together to create one huge piece of paper.

I took white construction paper and placed it under wax paper. I read that many brides only use wax paper, but using the white paper underneath made it a bit easier to see the tracings. (you'll see)
(This is just the white paper with wax paper over it)

Here are pictures of the actual runner rolled out, with the monogram traced on it. I used a mechanical pencil because i found the thinner lead was easier to work with since you really cant erase on the runner without ruining the fabric. Once every detail was traced on the runner i worked my way from the center out. I first used a 1' flat brush to out line the double R's.
I have to admit, it was a bit nerve wrecking initially. I purchased 4 small bottles of paint, black, white, light & dark grey. I didn't want to make the R's black, but i wanted them to be dark. I mixed the black and dark grey to get a pewtery color for the R's and then i mixed the light grey, white and added a few drops of the dark grey. I was very nervous that i would run out of paint, and since i mixed it myself, getting the precise color again would be nearly impossible. So make extra paint! Better safe then sorry. I, thank goodness, didn't run out.
Here are the completed R's. Its hard to see its true color because of the lighting in the room and i used the flash on someone the pictures. I let the R's dry overnight. You don't really have to let it sit overnight, but i was actually on my way out, so i decided to finish it the next day.The 'filigree' on the monogrammed became challenging at times. I had to use a tiny detailing brush. Its important to remember that when you are 'painting' you have to brush with the 'grain' of the fabric. I tried to not 'paint', more so push a tiny glob of paint around. Again i worked my way from the center out. I did have a few ''Oh Crap" moments- but i was able to fix any problems (splatters) without much effort.
Here are 2 pictures of the final monogram.

This picture is a little slanted, but i was standing on top of one of my moms dinning room chairs, trying to focus the camera and not fall off all at once.
Here we are, without flash, a bit higher off the ground (birds eye view = hanging from the light fixture)

I am beyond please with the results, the pictures don't do it much justice, in fact it kinda looks like a snowflake. Not what i was going for, But i love it anyway.

I'd like to also thank Juju & Gaby for their attempt at helping me.

I'm only Kiddin'! I appreciate your guys help.

Wednesday, April 22, 2009

Bridesmaids Bouquets

I started making my Bridesmaids bouquets with the help of Nati this past weekend. I purchase all the materials at Michael's, with a 30% entire purchase coupon of course! I was a little apprehensive about the girls having silk flowers, but my friend used all silk flowers for her wedding and even for her bouquet. Her flowers looked amazing and were a fraction of the cost of real ones.

Also, I didn't want to purchase a single color, or have them look monotone, so i wanted a nice mix of color. They are not completely finished, but this is what i have done thus far.

I purchased 16 stems/4 different colors to make 8 bouquets.

Here a few steps to the process:

1.Remove the flower bud it self from each individual 'branch'. Be careful to pull from the bottom of the flower bud, or else you could potentially tear off the petals themselves. Once you are done, the stem should look like this...

Here are all the actual buds off the flower. 2. Place buds back onto stems- I separated the 4 colors of flowers. I wanted them to be somewhat mixed, so i arranged a little assembly line and began with white, then pink, then green, and lastly the dark pink. I started around the outside and worked my way towards the center.

For some reason, even though all the flowers were the same just different colors, the branches & buds weren't interchangeable. So some colors, specifically the white one, had a smaller hole, then the rest. So what i had to do is literally shave off some of the plastic tip on the branch so that the flower bud would fit.


And since the buds/branches weren't all the same size, some buds were too big for the branch. My simple solution was to hot glue each bud onto the branch. Simple enough right? Well, i seem to have forgotten that i was working with plastic and melted a few of the branch tips with the hot glue. It took me a while to get the hang of it, but after a while i was a pro.

Tonight, i have one more stem to go and i will hopefully get them tied up and fully assembled. I will post the results tomorrow.