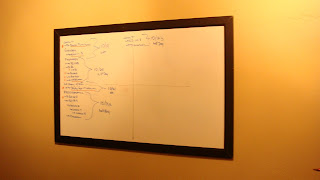
Juju has taken over my dinning room. That's right my dinning room, well now its his. He has set up his laptop and has spread his school books across every inch of my beautiful dinning room table. Then he uses this old, a bit broken down, white board to keep track of his assignments. Since this whiteboard is unsightly huge, he usually props it on the floor, against the wall, on a chair etc etc. because there was no way i wanted him to hang that thing on the wall.
See? It takes up 1/3 of the wall.
Here enters the brilliant idea of having it be functional for Juj and not an eyesore for the rest of the world. Since we are still working on a budget, we had to figure a way to solve this issue- inexpensively.
After much brainstorming, we decided on the project below. There was a few adjustments along the way, 3 visits to the store ( 2 Menard's, 1 Joann's) and blood, sweat and tears.
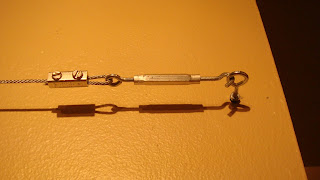
We purchased the needed supplies to build a tension cord system.
Here is a close up of the metal cord, cord 'crimper', turnbuckle and eyelet thingy.
Next we took 4 (14x18 i think) wrapped canvas that we already owned, and wrapped them in fabric purchased (on sale 50% off! orig.39.99/yd) at Joann's. For anyone interested in wrapping canvas in fabric, i strongly suggest purchasing a can of fabric adhesive. Its not necessary, but it makes it a lot easier to align the fabric to the desired position. Then simply fold and staple.
Watch your fingers though, using a staple gun can be very dangerous.... here is were the blood part came in.


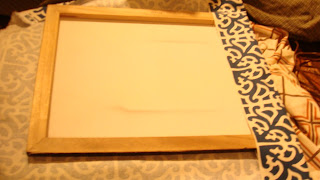
Here is one canvas just about done being wrapped.
Here is a close up. Pretty darn good eh?
Next we took 2 wrapped canvas an reinforced them together by adding a wooden backing, supporting each frame individually. This created 2 separate panels. In the left picture (on the right side) you can see how we created a panel, using 2 individual canvas. We measure 4 in. from the edge and carefully ( if you drill too fast you will snag and create pulls in the fabric) drilled holes to insert the hooks that would hook on to/sit on the actual metal cord.
So here you have it- Finished project. To hide the eyesore that is Juj's whiteboard we simply slide both panels together, creating a 'mural' if you will.
AND when juju needs to use the whiteboard, he simply slides the panels apart.
Overall this project was very inexpensive. It cost us about $48, and we have a lot of left over parts, pieces, 'capital' if you will, for our next project.


No comments:
Post a Comment